
You need to add name and date on photo when an exam form asks for it. You may have a clean passport photo ready. The notice says your name and the photo date must be printed on it. This tool does it for you in under a minute.
Upload your photo, pick a layout, type your name, choose the date and download. You can print the text on the photo or on a white strip below it. The tool takes JPG, JPEG, PNG and WEBP files up to 25 MB. It runs in your browser, so your photo stays on your device.
Add Name & Date to Photo
Stamp your name and date onto any photo in three simple steps — everything runs inside your browser.
Drag & drop photos here
or click to browse — you can also paste an image with Ctrl/Cmd + V
Supports JPG, JPEG, PNG, WEBP · Max 25MB per file
Preview 0
Layout
Live Preview
Preview uses your first uploaded photo — adjust settings to see it update live.
Stamp Settings
Tip: if you turn the background bar on, a light text color (white or amber) shows up best.
Processing…
Results
Why Exams Ask for a Photo With Name and Date
Some recruitment exams want your name and the date printed on the photo. The date is often called the Date of Photograph, or DOP. SSC notices, for example, have asked for this in past years. Check your own notice, because each board sets its own rule.
The reason is simple. A board wants proof that your photo is recent. Many notices say the photo must be taken within the last three to six months. A printed date lets the board check this. It also helps staff match your face to your hall ticket.
Notices use different words. You may read “photo with date”, “name and date on photo” or “photograph with name and date”. All of them ask for the same thing.
The Correct Format for Name and Date on Photo
Most notices ask for the same layout. Your name goes in capital letters, spelt exactly as on your certificate. The date goes on the line below, usually as DD/MM/YYYY. Both lines sit on a plain white strip at the bottom of the photo. The text is black.
| Part | What to do |
|---|---|
| Name | Capital letters, same spelling as your certificate |
| Date | DD/MM/YYYY, the day the photo was taken |
| Strip | Plain white, at the bottom of the photo |
| Text colour | Black. No fancy fonts or effects |
Here is a sample. Name: RAHUL KUMAR SHARMA. Date: 02/11/2026. This is only an example. Use your own details.
The same layout works for a passport size photo with name and date. It suits any name and date on photo request. The tool also crops to passport size, so you may not need a second tool. If you need a different crop, try our passport size photo maker.
[IMAGE PLACEHOLDER 2: In-article graphic: correct name and date layout (add-name-and-date-on-photo-layout.png, transparent PNG)]
Overlay on Photo or Card Below Photo for Name and Date on Photo?
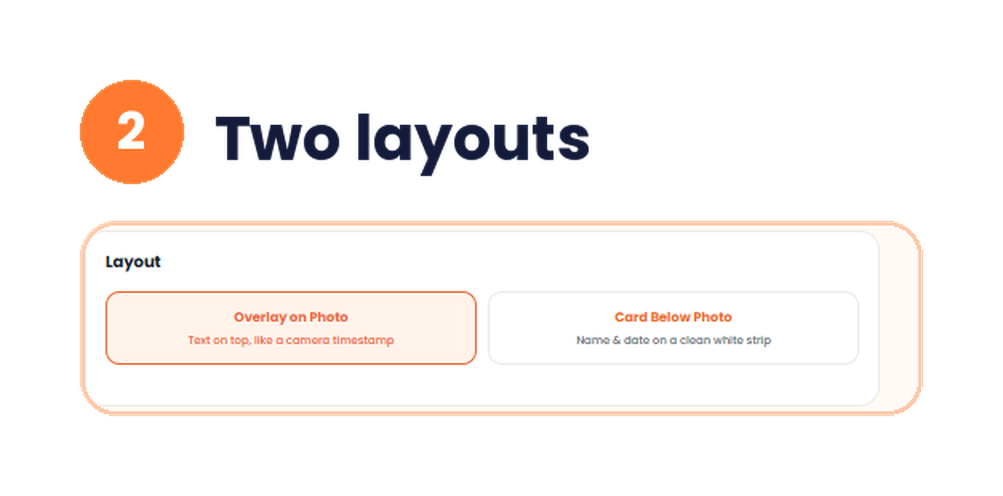
The tool gives you two layouts. Pick the one your notice describes.
| Layout | What it does | Use it when |
|---|---|---|
| Overlay on Photo | Puts the text on top of the photo, like a camera timestamp | The notice says “date on the photo” with no strip |
| Card Below Photo | Puts the name and date on a clean white strip | The notice asks for a strip, or for text that scanners can read |
For most exam forms, Card Below Photo is the safer choice. The white strip keeps the letters sharp and clear of your face. Overlay is fine for a casual timestamp.
How to Add Name and Date on Photo in 4 Steps
You do not need an app or an account to add name and date on photo.
Step 1: Upload your photo
Drag your photo into the box, or click Choose Photos. You can also paste an image with Ctrl or Cmd + V. The tool takes JPG, JPEG, PNG and WEBP files up to 25 MB each. Click Continue to Customize.

Step 2: Pick a layout
At the top you see two choices. Overlay on Photo puts the text on the picture. Card Below Photo puts your name and date on a white strip. For an exam form, start with Card Below Photo.
Step 3: Set your name and date
Live Preview shows your name and date on photo on the left, so you see the result before you save. Drag to position the photo, and pinch or scroll to zoom until your face fits the frame. Stamp Settings sit on the right.
Tick Add name and Add date. Type your name in capitals. Pick the date from the date box. Choose a Text Style: Classic Amber, Digital Red, Clean White, Bold Black or Custom. Bold Black suits a white strip. Set the Text Position to Left, Center or Right, and Top or Bottom.
The Text Size boxes start at 28 pt for the name and 18 pt for the date. Tick Add background bar for readability if the text is hard to see on the photo. Under Output size, choose Best quality, Under 100 KB, Under 200 KB or Custom. Then click Save & Process Photos.

Step 4: Check and download
The Results card shows your photo, the file name, the new size, the original size, the dimensions and the format. Zoom in on the name and date on photo. Read them letter by letter. Then click Download.

My Test: Name and Date on Photo for a Passport Image
I tested the tool by adding name and date on photo to a passport image. The original file was 47.7 KB. I used the Overlay on Photo layout with Classic Amber text. The position was Right and Bottom. The name was 28 pt and the date was 18 pt. Output size was on Best quality. The preview showed the sample text “Your Name” and the date 02/11/2026.
The Results card named the file passport-photo-1-35x45mm.jpg. It showed 413 × 531 pixels, JPG format and a size of 44.8 KB. That is a little smaller than the original, even with text added. The photo is also cropped to a passport size, which the file name suggests is 35 × 45 mm.
For an exam form, I would pick Card Below Photo and Bold Black. I tested the overlay layout, so check the strip result on your own photo before you upload.
DOP vs DOB: A Mistake to Avoid
DOP means Date of Photograph. It is the day the picture was taken. It is not your date of birth.
Many candidates print the wrong date. Both dates appear near your name on the form, so it is easy to mix them up. Read the label on the notice before you download. If it says DOP, use the photo date.
Common Mistakes That Get Photos Rejected
Blurry text. Chat apps compress images hard, and a name and date on photo made in a chat app often blurs. The edges of your letters blur, and a scanner may not read them. Add the text with a tool that keeps the image sharp.
Handwritten details. A paper held in the frame does not count. The name and date must be printed on the image itself.
Text on the signature. The name and date rule is for the photograph. Keep your signature file clean.
Wrong photo date. An old date can fail a “within three months” rule. Take a fresh photo if yours is too old.
Fancy styling. Amber or red text and shadows can be hard to read. If your notice does not ask for colour, use plain black on white.
What Photo Should You Start With?
Name and date on photo cannot fix a bad photo. Start with a good one. Stand in front of a plain, light wall. Use daylight if you can. Look straight at the camera and keep your head level.
Leave a little space below your chin. Do not wear a cap or dark glasses, unless your notice allows it. Take the photo near the date you plan to print. A photo that is eight months old will fail a three month rule.
Which Date Should You Print?
Print the day the photo was taken. If you take a new photo today, print today’s date. Some notices also give a cut-off, such as “taken after 1 August”. Check this line in your notice.
Do not change the date to make an old photo look new. Boards compare dates during document checks, and a wrong date can cancel your form. Take a fresh photo instead.
What If Your Name Is Long?
A long name can be hard to fit in a name and date on photo strip. Write the name exactly as on your certificate, with every part. Do not drop a middle name to save space. If the text looks too big, lower the Name size in Text Size. If it looks too small, raise it.
Check the preview before you download. Every letter should be easy to read at normal zoom.
Name on Photo Editor or a Simple Tool?
A general name on photo editor gives you fonts, colours and effects. You do not need these for an exam form. They add steps, and fancy text can cause a rejection. A tool with a layout choice, two text fields and a live preview is faster and safer.
To add name and date on photo by hand in another app, copy the same layout. Use capital letters, black text, a white strip and the DD/MM/YYYY date. Export the file as JPG and check the size.
Check the File Size Before You Upload
Many portals set a size limit for photos. A range like 20 KB to 50 KB is common, but each notice is different. The tool has an Output size setting. Pick Under 100 KB or Under 200 KB before you save. Choose Custom for another limit, such as 50 KB.
If the file is still too big, compress it after you add the text. That order keeps the letters sharp. Our 20 KB image compressor can bring the file under the limit. If your notice lists the size in MB, our MB to KB converter shows it in KB.
Some notices also ask for a signature next to the photo. Use our merge photo and signature tool for that.
Quick Checklist Before You Upload
- The name matches your certificate.
- The date is the day the photo was taken.
- The layout and text colour match your notice.
- Your name and date on photo are sharp when you zoom in.
- The file is in the format and size your notice asks for.
- The file opens on your phone and your computer.
Why Use a Simple Tool
Most notices ask for the same basic name and date on photo layout. They want a name, a date and a clear photo. You do not need a heavy photo editor for that. A photo date editor with two fields and a preview is enough. It also saves you a repeat edit when a second form needs a new date.
Browser based tools also protect your photo. Your image is not sent to a server. This matters for a photo tied to your identity.
Quick Answers Before You Start
What does DOP mean on an exam notice?
DOP means Date of Photograph. It is the date the picture was taken, not your birth date.
What format should the date be in?
Most notices ask for DD/MM/YYYY. Check your own notice before you submit.
Should my name be in capital letters?
Yes, if your notice does not say otherwise. Match the spelling on your certificate.
Which layout should I choose for an exam form?
Choose Card Below Photo to print name and date on photo as a clean white strip. Use Overlay on Photo only if your notice asks for text on the picture.
Can I add name and date in photo on my phone?
Yes. The tool works in a mobile browser. Pick the photo from your gallery.
Can I keep the file under 100 KB?
Yes. Choose Under 100 KB in Output size, or use Custom for another limit. Check the preview after you save.
Conclusion
A rejected name and date on photo costs you time near a deadline. Match your name to your certificate. Use the real photo date, not your birth date. Pick the layout your notice describes, and check the file size before you upload.